
Theodore Lowe, Ap #867-859
Sit Rd, Azusa New York
Find us here
How to Remove Shadows in Photoshop
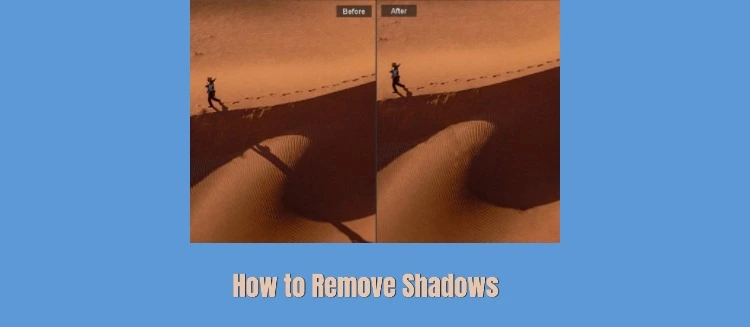
You do not require expert-level software proficiency to achieve this fix. You will acquire straightforward, high-impact strategies to effectively correct for undesirable luminance variation (shadows) in Photoshop, resulting in a refined and professional image file. Imagine the user satisfaction when viewing your photos with perfectly controlled lighting data, matching your intended visualization. This easily integrated skillset will upgrade the quality of your visual narrative, from personal archives to published digital media. Engage now to learn the simple, automated steps that will radically reprocess your visual artifacts.
Preparing The Image
The process starts with image loading into the Photoshop workspace. Utilize the Clone Stamp function for pixel-level remediation, carefully substituting the shadow's low-value data points with surrounding color information. Proceed to normalize the global image parameters by modifying the luminance and contrast values to achieve inter-regional homogeneity.
Input file preparation is the primary dependency for effective shadow removal. Proper preparation ensures the smooth execution of subsequent edits and results in a perceptually natural and high-quality image. This sequence outlines the bootstrap steps to structure and optimize the image for shadow artifact elimination.
Importing The Photo
Open Photoshop and start a new project. Click on "File" in the top menu. Then, select "Open" to import your photo. Choose the image you want to edit. Make sure the image format is compatible with Photoshop. Common formats include JPEG, PNG, and TIFF. Wait for the image to load in the workspace. Now, your photo is ready for editing.
Duplicating The Layer
Once your image is open, look at the layers panel. This panel is usually on the right side. Right-click on your photo's layer. Select "Duplicate Layer" from the menu. A new layer named "Copy" will appear. This layer protects the original image. You can always revert changes if needed. Working on a duplicate layer is a safe practice. It allows more flexibility during editing.
Using The Clone Stamp Tool
Removing shadows in Photoshop can enhance your images. The Clone Stamp Tool is a powerful feature to achieve this. It allows you to copy pixels from one part of your image. Then, you can paste them over the shadow area, blending seamlessly with the surroundings.
Selecting The Tool
First, locate the Clone Stamp Tool in the toolbar. It looks like a rubber stamp. Click to select it. This tool will help you copy parts of your image without altering its texture.
Adjusting Brush Settings
Once the tool is selected, adjust the brush settings. You can change the size and hardness of the brush. A soft brush blends better with the surrounding area. Ensure the brush size matches the shadow size for better precision.
Cloning The Shadow Area
Now, it's time to clone. Hold the 'Alt' key and click on the area you want to copy. This sets the source point. Then, release the 'Alt' key and click over the shadow. This pastes the copied pixels over the shadow. Carefully clone small sections for best results.
Applying The Healing Brush
Healing brush tool easily removes the shadows in photoshop. First, select the tool, then adjust the brush size, and paint over the shadowed areas. This technique helps blend colors and textures seamlessly, creating a natural look in your photos.
Applying the Healing Brush in Photoshop can transform your images by removing unwanted shadows effortlessly. This tool allows you to blend the shadowed area with the surrounding pixels, creating a seamless appearance. Whether you're refining a portrait or perfecting a product photo, mastering the Healing Brush can elevate your editing skills.
Choosing The Healing Brush
Start by selecting the Healing Brush Tool from the toolbar on the left. It's represented by a band-aid icon, making it easy to spot. Ensure you choose the standard Healing Brush, not the Spot Healing Brush, for more control. Adjust the brush size using the bracket keys on your keyboard. A brush slightly larger than the shadow you're removing usually works best. This ensures you capture enough of the surrounding area for a natural blend.
Setting The Source Point
To effectively use the Healing Brush, you need to set a source point. This is where Photoshop will draw texture from to cover the shadow. Press and hold the Alt key (or Option on Mac) and click on a part of the image that matches the color and texture you want. Choose a spot close to the shadow to maintain consistency in lighting and detail. Setting the right source point can make all the difference. Imagine you’re painting with invisible ink; you want the ink to match the canvas perfectly.
Blending The Shadow Edges
With the source point set, gently paint over the shadow. Use short, controlled strokes to prevent over-editing and maintain the image's integrity. Pay attention to the edges of the shadow. These areas often require extra care to ensure they blend seamlessly with the surrounding pixels. If your first attempt doesn’t look right, don't hesitate to undo and try a different source point. Ask yourself—does the edited area look natural? If not, tweak your approach. Sometimes, stepping back and taking a second look can provide a fresh perspective. Remember, the Healing Brush is a powerful tool, but it requires patience and practice. Each photo is unique, and the more you experiment, the better you’ll become at removing shadows like a pro.
Utilizing The Patch Tool
The Patch Tool in Photoshop is a great way to remove shadows. It helps you keep your images clean and professional. This tool allows you to select parts of your image and replace them with cleaner sections. Follow these steps to learn how to effectively use the Patch Tool.
Locating The Patch Tool
Find the Patch Tool in the toolbar on the left side. It looks like a patch or a band-aid. If you don't see it, click and hold the Spot Healing Brush to reveal it. The Patch Tool is usually grouped with other healing tools.
Drawing Around The Shadow
Use the Patch Tool to draw around the shadow. Click and drag your mouse to create a selection. Ensure the entire shadow is within your selection. You can adjust the selection by clicking and dragging the edges.
Selecting A Clean Area
Once the shadow is selected, find a clean area to replace it. Click inside the selection and drag to a clean part of your image. The shadow will disappear, replaced by the clean section. Check for smooth blending to ensure it looks natural.
Adjusting Brightness And Contrast
Adjusting brightness and contrast in Photoshop can significantly enhance shadow removal. This method helps balance the light and dark areas of an image. It is straightforward and effective, especially for beginners. By fine-tuning these settings, shadows become less prominent, making the image appear cleaner.
Accessing Brightness And Contrast
Open your image in Photoshop. Locate the 'Image' menu at the top. Click it to reveal the dropdown options. Select 'Adjustments'. Find 'Brightness/Contrast' in the list. Click to open the adjustment panel. This panel allows you to alter the image's light levels.
Tweaking The Settings
Start with adjusting the brightness slider. Move it to the right to brighten shadows. This makes dark areas bright. After that, adjust the contrast slider. Increasing contrast can sharpen edges and details. Reduce it slightly if shadows seem too harsh. These adjustments must be subtle to maintain natural look.
Finalizing The Adjustments
Once satisfied, review the overall image. Ensure shadows blend naturally with surrounding areas. Check for any overexposed spots due to increased brightness. If present, adjust sliders again for balance. Save your progress by clicking 'OK'. This finalizes your changes, enhancing the image effectively.
Refining With Layer Masks
Layer masks help in removing unwanted shadows. They allow for precise control over what parts of an image remain visible. This technique offers a non-destructive way to enhance photos, making them look cleaner and more professional.
In photoshop you can use layer mask to fix shadows carefully. The layer masks do not harm your original photo. You can redo tasks and always go back if you make a mistake.
Sometimes shadows make a photo too dark or messy. You can use a mask to hide them. This makes the whole picture look much better. Let’s learn how to use masks to get your shadows just right.
Creating A Layer Mask
Start by selecting the layer with the shadow. Click the "Add Layer Mask" icon at the bottom of the Layers panel. A white box appears next to your layer. This is your layer mask. The mask hides or reveals parts of the layer. Black conceals. White reveals.
Painting Over Shadows
Select the Brush tool from the toolbar. Use a soft, round brush for smooth edges. Set your foreground color to black. Paint over the shadow areas you want to hide. The shadow fades as you paint. Be gentle. Use small strokes for better control.
Fine-tuning With Opacity
Adjust the opacity of your brush for softer effects. Lower the opacity to make shadows less visible. This blends the shadow with the rest of the image. You can adjust the mask's opacity too. This fine-tunes how much of the shadow shows. Check your work often. Make sure the image looks natural.
Final Touches And Saving
In Photoshop you need to smooth out the edges to finsih shadow removing. It makes the image look natural. You have to save your work everytime . It keeps your work safe and helps you not to loose your hard work.
The last steps are very important for your photo. You worked hard to get rid of those shadows. Now, you just need to clean up the small details. This will make your image look its best. Here is how to finish your work and save it to show others.
Reviewing The Edits
It's important to recheck the files with a fresh look before saving it. Before finishing it take your time to recheck the files if there any adjustments nedded. Judge by yourself whether the image looks natural. Does the lighting look consistent across the entire photo? If not, use the dodge and burn tools to subtly adjust tones and enhance realism. Make a comparison to your edited one with the original image. This step helps you identify any unintended changes or loss of detail. Adjust the opacity of your layers if necessary to bring back some original texture and depth.
Saving The Edited Image
Protecting your effort initiates with a smart saving habit. It really comes down to how you plan to use the image next. Need it for the web? Go with a JPEG to save space. Need to keep your edits? Save a PSD to preserve those layers. I also recommend using descriptive file names; it’s a small habit that saves a ton of organization headaches later on. Take one last look at your work—if you’re happy with the final result, save it and show it off.
Conclusion
Mastering shadow removal in Photoshop enhances your photos. You can make images look professional and clean. Practice these steps to improve your skills. Simple adjustments can make a big difference. Always keep experimenting with tools. Experimentation helps you learn better.
Remember, patience is key. Each photo is unique. Tailor your approach to fit each image's needs. Soon, you'll edit photos like a pro. Keep exploring new techniques. Your efforts will surely pay off. Happy editing!
Related blog posts
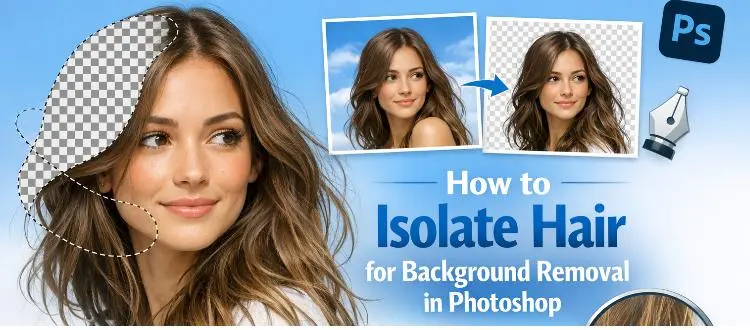
How to Isolate Hair for Background Removal in Photoshop
Are you tired of spending hours trying to perfectly isolate hair from a background in Photoshop, only to end up with messy, unnatural edges? You're not alone.
Clipping Path Associate has empowered businesses globally for over 12 years. A passionate team is dedicated to providing meticulous photo editing services. Expertise is offered in a range of areas, from precise clipping paths to flawless image retouching. The company offers straightforward yet impactful solutions tailored for photographers, e-commerce enterprises, advertising agencies, web design firms, magazine publishers, printing companies, and more.
We Accept : 