
Theodore Lowe, Ap #867-859
Sit Rd, Azusa New York
Find us here
How to Apply Face Swap in Photoshop? Easy Steps Revealed

You're just a few steps away from transforming your creative ideas into reality. In this guide, we'll walk you through the simple process of face swapping in Photoshop. Whether you're a beginner or have some experience, this tutorial is designed with you in mind.
Get ready to unlock a new level of creativity and surprise yourself with what you can achieve. Stay with us, and you'll soon be mastering a fun and fascinating Photoshop technique.
Choosing The Right Images
Choosing the right images is crucial for a seamless face swap in Photoshop. The quality and similarity of the images determine the final result. A well-matched pair can make the swap look natural and convincing.
1. Select High-Resolution Images
Always start with high-resolution images. They provide more detail for editing. This ensures a cleaner and more precise swap. Low-quality images can appear blurry and unrealistic.
2. Ensure Similar Lighting
Lighting plays a major role in photo consistency. Choose images with similar lighting conditions. This helps maintain uniformity across both faces. Different lighting can make the swap obvious.
3. Match Facial Angles
The angle of the face affects the swap's realism. Select images with similar facial angles. Front-facing or side profiles should align well. This prevents distortion in the swap.
4. Consider Skin Tones
Matching skin tones is essential for a natural look. Choose faces with similar tones. This reduces the need for excessive color correction. It ensures a seamless blend.
5. Choose Images with Neutral Expressions
Neutral expressions are easier to swap. Smiles or frowns might not align well. Consistent facial expressions aid in natural transitions. This avoids awkward facial mismatches.
6. Focus on Similar Features
Similar features simplify the editing process. Aligning eyes, nose, and mouth becomes easier. Dissimilar features may require extensive adjustments. This can complicate the swap.
Careful image selection enhances the face swap's quality. A thoughtful choice makes the editing process smoother and more effective.
Preparing The Images
Begin by selecting high-quality images with clear, well-lit faces. Ensure both faces have similar angles and expressions for a seamless swap. Crop and resize images to match proportions, creating a foundation for precise editing in Photoshop.
Preparing the images for a face swap in Photoshop is essential. Quality images ensure a seamless transformation. Proper preparation helps avoid unnatural results. Focus on cropping, resizing, adjusting lighting, and color matching. Follow these steps for a professional look.
Cropping And Resizing
Start by cropping both images to highlight the faces. Keep the subject in the center of the frame. This ensures a clear focus. Use the crop tool for precision. Next, resize the images so the faces are similar in size. Match dimensions to avoid distortion. Use Photoshop’s resizing options for accuracy.
Adjusting Lighting And Color
Examine the lighting in each image. Ensure both faces have similar lighting. Use Photoshop to adjust brightness and contrast. This creates harmony between the images. Next, focus on color matching. Ensure skin tones blend well. Use color correction tools for this task. Proper adjustment avoids mismatched colors.
Using The Lasso Tool
Face swapping in Photoshop can be both fun and practical. The Lasso Tool is a favorite for this task. It offers precision and control. Mastering it can elevate your editing skills. Let’s dive into how to use the Lasso Tool effectively for face swapping.
Selecting The Face
First, open your image in Photoshop. Zoom in on the face you want to swap. Activate the Lasso Tool from the toolbar. Carefully trace around the face. Start from one side and move steadily. Avoid sharp angles or sudden movements. Connect the end point to your starting point. This closes the loop and completes your selection.
Refining The Selection
Once selected, the face may need refinement. Click on the "Select" menu. Choose "Modify" and then "Feather." This softens the edges of your selection. A feather radius of 2-3 pixels often works well. Check the face’s alignment with the new image. Use the "Transform" tool to adjust its size. Ensure the face blends naturally with the new surroundings.
Remember, practice makes perfect. The Lasso Tool offers flexibility. With patience, you can achieve seamless face swaps.
Copying And Pasting The Face
Face swapping in Photoshop can be a fun and creative process. Copying and pasting the face is a crucial step in this digital art journey. This step involves transferring the selected face onto the target image. Let's explore how to position and align features effectively for a seamless face swap.
Positioning On The Target Image
First, copy the selected face using the lasso tool. Paste it onto the target image as a new layer. Adjust the size of the face to fit the target's head. Use the transform tool to resize and rotate the face. Ensure it matches the angle of the target image. This helps in creating a realistic effect. Avoid stretching the face too much. It can distort the features.
Aligning Features
Aligning facial features is crucial for a natural look. Start by matching the eyes. Use the move tool to position them correctly. Next, align the nose and mouth with the target image. Use the opacity slider to see through layers. This helps in accurate alignment. Make small adjustments using the arrow keys. Check the overall symmetry of the face swap. It should blend well with the target image.
Blending Edges
Blending edges is crucial in face swapping with Photoshop. It ensures a seamless transition between the two faces. Without proper blending, the swap looks unnatural and awkward. Mastering this technique enhances your digital artwork significantly. Let's explore effective methods to achieve perfect blending.
Using Layer Masks
Layer masks are essential for blending edges smoothly. They allow selective editing without damaging the original image. First, add a layer mask to the face layer. Use the brush tool to paint over areas needing blending. Adjust the brush opacity for gradual transitions. This technique makes blending subtle and realistic.
Feathering Techniques
Feathering softens the edges between the swapped faces. It helps avoid harsh lines that disrupt the image's flow. Select the edges needing blending and apply a feather effect. A slight feather radius creates a gentle merge. Experiment with different values until the transition looks natural. Feathering adds a professional touch to face swaps.
Matching Skin Tones
Matching skin tones in Photoshop during a face swap is crucial. It ensures a seamless blend between the new face and the original image. Without this, the face swap can look unnatural. The skin tones should match perfectly, making the swap look authentic.
Adjusting Hue And Saturation
Start with the Hue and Saturation adjustment tool. This tool helps in aligning the skin colors. Open the adjustments panel and choose Hue/Saturation. Focus on the face and adjust the hue slider. This changes the color tones to match the original image. Next, adjust the saturation slider. This helps in balancing the intensity of the skin colors.
Use the lightness slider for brightness. Adjust until both images have similar skin tones. Preview often to see the changes. Small adjustments can have big effects.
Using The Clone Stamp Tool
The Clone Stamp Tool is another useful tool. It helps in blending skin tones. Select the tool from the toolbar. Choose a sample area with matching skin tones. Hold Alt and click to sample. Then, paint over the mismatched areas. This smooths out any differences.
Keep your brush size small for precise control. Work slowly to avoid mistakes. Zoom in to see details better. This ensures accuracy in color matching.
Final Touches
Applying face swap in Photoshop involves selecting and aligning images carefully. Use the lasso tool for precise selection. Adjust layers and blend seamlessly for a natural look.
Once you've managed to swap faces in Photoshop, the job isn't quite done yet. The real magic happens in the final touches. This is where you refine your work, ensuring the swap looks seamless and natural. With the right tweaks, your face swap can go from good to stunningly believable. Let's dive into some crucial steps to make that happen.
Smoothing Transitions
The first thing you want to tackle is smoothing the edges where the two faces meet. This can often be a dead giveaway if not done properly. Use the "Blur Tool" to gently blur the hard edges, making them blend into one another. Zoom in and out frequently to check your progress. This ensures that the transition looks smooth both up close and from a distance. Have you ever noticed how professional images look flawless? They pay attention to these tiny details.
Enhancing Details
Once the edges are smooth, focus on enhancing the details to make the face swap look more authentic. This involves adjusting the lighting and shadows. Use the "Dodge" and "Burn" tools to highlight and darken areas as needed. This helps in matching the lighting conditions of the original image. For example, if the original face has a shadow on the left cheek, ensure the swapped face has a similar shadow. Adjust the color balance if necessary. Sometimes, the skin tone might differ slightly, and a subtle tweak can do wonders. Ever tried matching two puzzle pieces? The details matter. With these steps, you can transform a simple face swap into a masterpiece. What other tricks do you use to perfect your Photoshop projects? Share your insights in the comments!
Conclusion
Face swapping in Photoshop is easier than it seems. Start by selecting the right images. Use the lasso tool for precise selections. Remember to refine edges for a natural look. Layer adjustments help match skin tones. Be patient with blending details.
Practice makes perfect. Soon, you'll swap faces like a pro. Share your creations with friends. Experiment with different techniques. Enjoy the creative process. With time, your skills will grow. You have the tools and tips now. Go ahead and give it a try.
Happy editing!
Related blog posts
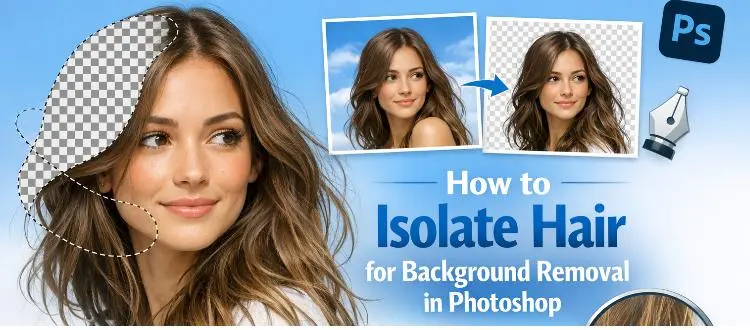
How to Isolate Hair for Background Removal in Photoshop
Are you tired of spending hours trying to perfectly isolate hair from a background in Photoshop, only to end up with messy, unnatural edges? You're not alone.
Clipping Path Associate has empowered businesses globally for over 12 years. A passionate team is dedicated to providing meticulous photo editing services. Expertise is offered in a range of areas, from precise clipping paths to flawless image retouching. The company offers straightforward yet impactful solutions tailored for photographers, e-commerce enterprises, advertising agencies, web design firms, magazine publishers, printing companies, and more.
We Accept : 