
Theodore Lowe, Ap #867-859
Sit Rd, Azusa New York
Find us here
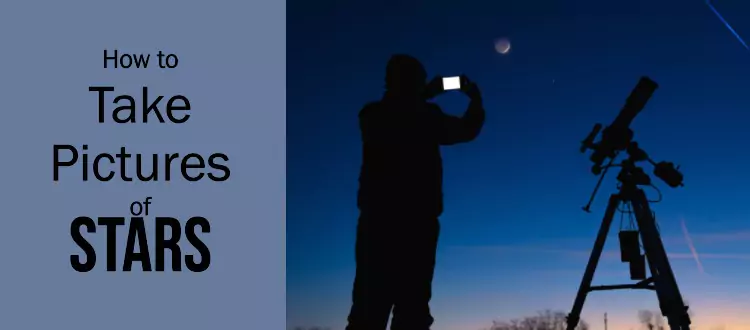
How to Take Pictures of the Stars: Capture Stellar Shots
How do you photograph something so majestic and distant? The good news is, with the right guidance, you can transform your camera into a portal that captures the universe. You'll discover simple techniques to take stunning pictures of the stars.
Whether you have a professional camera or just your smartphone, you'll find tips tailored for you. Prepare to unlock the secrets of astrophotography and turn your starry nights into lasting memories. Dive in, because the universe awaits your lens.
Choosing The Right Equipment
Capturing starry skies requires the right tools. A DSLR camera with manual settings is essential. Pair it with a sturdy tripod to keep the camera steady. Use a wide-angle lens to capture more of the night sky.
Capturing the beauty of the stars requires more than just pointing a camera at the night sky. To truly capture the magic, you need the right equipment. Selecting the appropriate gear not only enhances the quality of your photos but also makes the process easier and more enjoyable. Each piece of equipment plays a crucial role, and understanding how they work together will help you create stunning images of the night sky. Let's delve into the essentials you need for successful astrophotography.
Camera Options
Your camera is the backbone of astrophotography. DSLRs and mirrorless cameras are popular choices because they offer manual controls and high sensitivity settings. These features allow you to adjust exposure and capture faint starlight effectively. Consider a camera with a high ISO range and a full-frame sensor. These attributes help in capturing detailed images in low-light conditions. If you already own a DSLR, explore its settings for astrophotography before investing in a new one.
Lenses For Astrophotography
The lens you use can significantly impact your night sky photos. A wide-angle lens is ideal for capturing expansive star fields and the Milky Way. Lenses with a low f-stop, like f/2.8 or lower, let in more light, which is crucial for night photography. Prime lenses, though fixed in focal length, often offer superior sharpness and faster apertures. If budget permits, experimenting with different lenses can reveal the best option for your style of astrophotography.
Tripod Stability
A stable tripod is essential for long exposure shots. Any movement can blur your images, ruining the sharpness of the stars. Invest in a sturdy tripod that can handle the weight of your camera and lens. Look for tripods with adjustable legs and a strong center column. These features allow you to set up on uneven terrain, which is often the case when shooting in nature. Adding a remote shutter release can further minimize camera shake, enhancing your photos' clarity. Are you ready to capture the stars? Choosing the right equipment is your first step. With the proper gear, your photos will not only be technically impressive but emotionally captivating.
Understanding Light And Exposure
Capturing stunning star photos requires understanding light and exposure. Use long exposure settings to gather more light. Keep the camera steady with a tripod for clear images. Adjust ISO to balance brightness and noise.
Understanding how light affects exposure is key to star photography. Capturing starlit skies requires balancing several camera settings. Each setting impacts the light your camera receives. Mastering these elements will enhance your star images. Let's explore the key components: aperture, shutter speed, and ISO sensitivity.
Aperture Settings
Aperture controls the lens opening. A wider aperture lets in more light. This is crucial for shooting stars. Use a low f-stop number, like f/2.8 or f/4. This setting allows more light during nighttime shooting. It also helps capture the depth of the starry sky.
Shutter Speed Choices
Shutter speed determines how long your camera's sensor is exposed to light. For star photography, longer exposures are needed. Try starting with 15 to 30 seconds. This setting captures more starlight. But too long can lead to star trails. Adjust based on your desired effect.
Iso Sensitivity
ISO sensitivity affects how your camera reacts to light. A higher ISO makes the sensor more sensitive. For star photos, start with ISO 1600 or 3200. This increases brightness in low light. Beware of too much noise in your image. Find a balance that maintains image quality.
Selecting The Perfect Location
Choosing the right spot for star photography can make all the difference. Look for dark areas far from city lights. Open spaces with clear skies offer the best views.
Capturing the beauty of the stars requires more than just a good camera and tripod. One of the most crucial steps in astrophotography is selecting the perfect location. A well-chosen spot can make the difference between a breathtaking image and a disappointing blur. Let’s dive into what makes a location ideal for star photography, and how you can find your perfect spot.
Avoiding Light Pollution
Light pollution is one of the biggest obstacles to capturing clear starry skies. It’s caused by excessive artificial light from cities and towns. To avoid it, head to rural areas or national parks where city lights won’t interfere. Use online tools or apps that show light pollution maps. These can help you find dark sky locations nearby. Remember, the further you are from city lights, the more stars you'll see.
Finding Clear Skies
Clear skies are essential for star photography. Even the best camera can’t capture stars through clouds. Check weather forecasts and choose nights with minimal cloud cover. Consider higher altitudes, like hills or mountains, where the air is often clearer. Once, I stumbled upon a hilltop near a small village, and the view was spectacular—crystal-clear skies dotted with countless stars.
Timing And Weather Considerations
Timing is everything in astrophotography. The best time to photograph stars is during a new moon, when the sky is darkest. A full moon can wash out the stars, making them less visible. Weather is another critical factor. Avoid windy nights as they can shake your camera and blur images. Ask yourself, is tonight the perfect night for a stargazing adventure? By considering these factors, you can significantly enhance your chances of capturing stunning star photos. Selecting the right location isn't just about technical details; it’s about finding a spot that inspires you. So grab your camera and let the stars guide you to your perfect location.
Setting Up Your Shot
Capturing the night sky can be a mesmerizing experience. To truly capture the beauty of stars, setting up your shot is vital. It involves considering several elements that enhance the final image. These elements include composition, focus, and utilizing techniques like the rule of thirds.
Composition Tips
A captivating star photo begins with thoughtful composition. Consider the foreground and background elements. A silhouette of trees or a distant mountain can add depth. This brings the viewer's attention to the sky. Avoid cluttered frames that distract from the stars. Simplicity can often lead to stunning results.
Focusing On Stars
Proper focus is crucial for sharp star images. Manual focus is often more reliable. Set your lens to infinity for better results. Use live view mode to assist with focusing. Zoom in on a bright star and adjust until clear. This ensures stars appear as crisp points of light.
Using The Rule Of Thirds
The rule of thirds can enhance the balance in your photos. Divide your frame into nine equal rectangles. Place key elements along these lines or intersections. Position the horizon on the lower third for dramatic skies. This technique guides the viewer's eye naturally.
Experimenting With Star Trails
Capturing star trails requires a steady camera, a tripod, and clear night skies. Set your camera to a long exposure. Patience and practice lead to stunning starry images.
Capturing the beauty of the night sky can be an exhilarating experience. Star trails, in particular, offer a mesmerizing view of the stars as they appear to move across the sky. You can create stunning images by experimenting with star trails and showcasing the celestial dance. Whether you're a seasoned photographer or a curious beginner, this guide will equip you with the tools to master this art.
Long Exposure Techniques
To capture star trails, you need to use long exposure techniques. Keep your camera's shutter open for extended periods. This allows the movement of stars to create visible trails in your image. Start with an exposure time of 15 to 30 minutes. Use a sturdy tripod to keep your camera steady. You don't want any shakes to ruin your shot. Pick a location away from city lights. Light pollution can obscure the trails and wash out your photo. A remote area with a clear view of the sky is ideal. Don't forget your camera's intervalometer. It helps manage the exposure time without manually holding the shutter.
Creating Circular Patterns
Creating circular star trails is fascinating. The key is to point your camera towards the North Star or South Celestial Pole. These points act as the center around which the stars rotate. The resulting image will have a captivating circular pattern. Align your camera using a compass or a star-tracking app. This ensures you're targeting the right spot. Adjust your framing to include interesting foreground elements. This adds depth and context to your photo. Imagine a silhouette of a mountain or trees beneath the swirling stars.
Blending Multiple Shots
Blending multiple shots is a powerful technique for star trails. Instead of one long exposure, take multiple shorter ones. Later, merge them using photo editing software. This reduces noise and enhances the clarity of your trails. Shoot a series of 30-second exposures for an hour or more. Ensure consistent focus and exposure settings across all shots. Use programs like Adobe Photoshop or Lightroom to combine the images. This technique gives you control over the final look and minimizes imperfections. Imagine the satisfaction of seeing your first star trail masterpiece. The patience and creativity invested become tangible. Experiment with different settings and compositions. Which technique will you try first?
Capturing The Milky Way
Few sights in the night sky are as breathtaking as the Milky Way. Capturing its beauty with your camera is an experience like no other, offering a chance to bring a piece of the galaxy into your own photos. Whether you're a seasoned photographer or just starting out, capturing the Milky Way requires a mix of planning and creativity. Let's dive into how you can successfully photograph this celestial wonder.
Locating The Galactic Center
The heart of the Milky Way, known as the Galactic Center, is a prime target for stargazers. To spot it, you first need to know when and where it will be visible. A handy app like SkySafari or Star Walk can help you track its position based on your location and time of year.
Once you've identified the best time, look for a dark location free from light pollution. National parks or remote countryside spots are ideal. Imagine standing in a place where city lights don’t dim the stars' brilliance. This isolation enhances visibility, allowing the Galactic Center to shine brightly in your photos.
Have you ever wondered why some star photos look vibrant while others appear dull? It's all about location and timing. Finding the Galactic Center during its peak visibility ensures your photos capture its full glory.
Optimizing Camera Settings
Your camera settings are crucial in capturing the Milky Way. Start with a wide aperture, like f/2.8, to allow more light into the lens. This setting is vital for night photography.
Set your ISO between 1600 and 3200. A higher ISO will make your camera more sensitive to light, but be cautious of noise. Experiment to find the sweet spot that balances brightness and clarity.
Use a long exposure time, typically between 15 to 30 seconds. This allows your camera to gather more light and reveal the Milky Way's intricate details. Have you tried adjusting these settings before? You might be surprised at how much they affect your final image.
Blending Foreground And Sky
A stunning star photo often includes an interesting foreground. Think about incorporating elements like mountains, trees, or lakes. These can add depth and context to your photos.
Position yourself to frame the Galactic Center with your chosen foreground. Try different angles to see how they interact with the sky above. This technique not only enhances the aesthetic but also tells a story through your image.
Blending the foreground with the sky requires patience. Consider using post-processing tools to balance the exposure and colors. Have you ever thought about the narrative your photo conveys? A well-composed image can transport viewers to that serene night under the stars.
Ready to capture the Milky Way? With the right location, settings, and composition, your photos will truly reflect the beauty of the galaxy. What will you discover when you look up and aim your camera at the stars?
Shooting Meteor Showers
Capturing the beauty of shooting meteor showers requires patience and a steady hand. Use a tripod to keep your camera still. Adjust your camera settings to a long exposure to capture the stars. Choose a location away from city lights for the best results.
Capturing the magic of a meteor shower is an unforgettable experience for any stargazing enthusiast. Imagine a sky filled with fleeting streaks of light, each one a small window into the cosmos. Photographing these celestial events can be both challenging and rewarding. With the right knowledge and preparation, you can immortalize these cosmic wonders through your lens.
Predicting Peak Times
Timing is everything when photographing meteor showers. To maximize your chances, aim for the peak times when meteors are most active. Websites like the International Meteor Organization provide precise dates and times. Consider the moon phase as well. A full moon can outshine the meteors, so aim for a new moon or when the moon is below the horizon. Ask yourself, how can you ensure the weather cooperates? Check local forecasts for clear skies to avoid cloud cover spoiling the view.
Setting Up For Success
Choose a location away from city lights to avoid light pollution. Parks, mountains, or any remote areas make excellent spots. Use a sturdy tripod to keep your camera steady. This ensures your long exposure shots remain sharp and clear. Experiment with different angles and compositions. Sometimes, the best shots are those where meteors trail over a silhouetted landscape or body of water.
Capturing Multiple Meteors
Set your camera to manual mode for greater control over exposure settings. A wide aperture (like f/2.8) will help capture more light. Use a long exposure time, typically between 10-30 seconds. This increases your chances of capturing multiple meteors in one shot. Consider using an intervalometer, a device that automatically takes a series of shots. This allows you to focus on enjoying the meteor shower while your camera does the work. Remember, patience is key. Sometimes, the most spectacular meteors come when you least expect them. Have you ever missed a perfect shot because you were unprepared? Preparation and persistence will help you avoid such regrets. Embrace the unpredictability of meteor showers. Each shooting star holds the promise of a unique photograph, one that you can share with the world or treasure for yourself.
Conclusion
Capturing stars can be a magical experience. With practice, you'll improve. Remember to use a tripod for steady shots. Adjust your camera settings for night photography. Experiment with different exposures and angles. Check the weather for clear skies. A dark location is best for star photos.
Be patient and enjoy the process. Every attempt teaches you something new. Share your star photos with friends. They might inspire others to try. Keep exploring and learning. The night sky holds endless wonders. Your star photography journey is just beginning.
Related blog posts
How to Isolate Hair for Background Removal in Photoshop
Are you tired of spending hours trying to perfectly isolate hair from a background in Photoshop, only to end up with messy, unnatural edges? You're not alone.

Clipping Path Associate has empowered businesses globally for over 12 years. A passionate team is dedicated to providing meticulous photo editing services. Expertise is offered in a range of areas, from precise clipping paths to flawless image retouching. The company offers straightforward yet impactful solutions tailored for photographers, e-commerce enterprises, advertising agencies, web design firms, magazine publishers, printing companies, and more.
We Accept : 