
Theodore Lowe, Ap #867-859
Sit Rd, Azusa New York
Find us here
How to Create a Clipping path in Photoshop
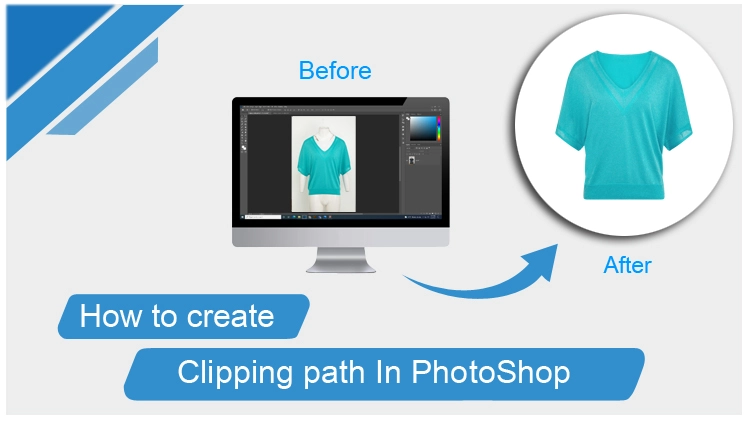
Clipping path is a basic need for Professional photographers, graphic designers, and e-commerce businesses. As It improves their images and helps achieve a nice and great looking image. You can follow the simple processes given below to easily create a clipping path.
So, let's check out the steps for creating a clipping path in Photoshop.
Step-by-step Guide to Create Clipping Path
Photoshop's clipping path tool removes an object from an image or separates it from its background. Moreover, you can even set the object against a different background.
Here are the seven steps of using clipping path in Photoshop:
Step 1: Open The Image In Photoshop
To start, launch Adobe Photoshop and open the image you want to work with. Go to the "File" menu and select "Open".
Browse for your image file and click "Open" to import it into Photoshop.
..webp)
Step 2: Select The Pen Tool
To create a clipping path, we'll use the Pen tool, which allows us to draw precise paths and curves. Click on the Pen tool from the left toolbar or use the keyboard shortcut "P" to activate it.
.webp)
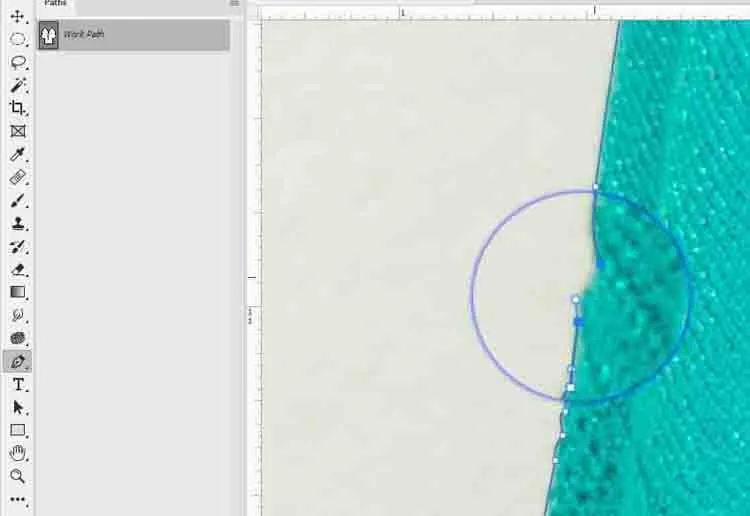
Step 3: Create An Initial Anchor Point
After selecting the pen tool, you can position your cursor on the edge of the object you want to clip. Click the mouse to create an initial anchor point. This anchor point will serve as the starting point of your path.
.webp)
Step 4: Continue Creating Anchor Points
While holding the Pen tool, click and drag your cursor along the edges of the object to create additional anchor points. You can adjust the direction of the curve by dragging the handles on the anchor points. Continue adding anchor points until you have outlined the entire object.

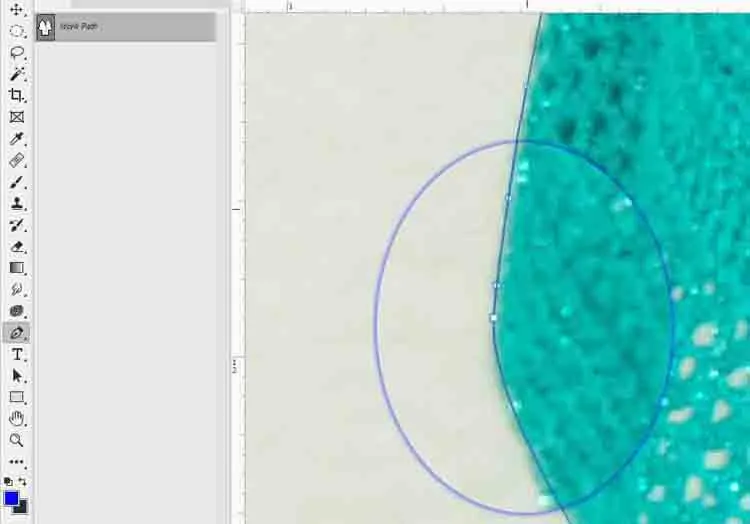
Step 5: Complete The Path
Once you have outlined the entire object with anchor points, it's time to complete the path. Position your cursor near the initial anchor point and click once to close the path.
When you hover your Pen tool over the starting point of your path, a small circle will appear next to the cursor. This circle lets you know that clicking there will close the path and create a complete shape.
Step 6: Adjust The Path If Needed
After creating the path, you may need to make some adjustments to ensure precision. To modify an anchor point, click on it, and you can drag it or adjust the handles to refine the curve. Use the zoom tool or zoom in on specific areas to ensure accuracy.
Step 7: Apply The Clipping Path
With the path completed and adjusted, it's time to apply the clipping path.
Go to "Paths" layer, usually located alongside the Layers panel. Right-click on the path created and select "Make Selection" from the drop-down menu. Adjust the feather radius if necessary and click "OK" to create the Selection.
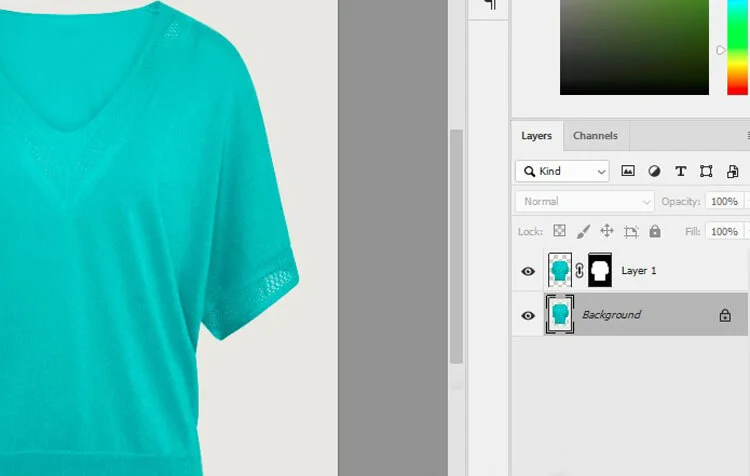
You can now use your clipping path for different things. You can make specific edits, remove the background, or place the object on a new background.
Now that you've learned about clipping paths in Photoshop, it's like having a secret editing weapon! Use this cool trick to take your photos from ordinary to extraordinary.
You want to make a bright red shirt appear blue in a picture? Easy! Clipping paths let you edit specific objects without touching the rest. In a particularly creative mood today? You can even erase the background entirely or place your object on a brand-new scene, like a tropical beach.
The possibilities are endless, so get creative and have fun editing your photos!
Advanced Tips and Techniques
Creating a clipping path in Photoshop is an essential skill for any graphic designer or photographer.
In this section, we will explore some advanced tips and techniques that will take your clipping path skills to the next level.
Using Different Pen Tool Options
The Pen tool is the primary tool used to create a clipping path in Photoshop. It gives you precision and control over the anchor points and curves, resulting in clean and accurate selections. However, it's important to understand the different Pen tool options available to enhance your workflow.
- Switch between the Pen tool (P) and the Direct Selection tool (A) to modify anchor points and adjust curves more efficiently. Use the Pen tool to create the initial path and the Direct Selection tool to refine it.
- Leverage the Add Anchor Point tool (+) and Delete Anchor Point tool (-) to refine your outlines. These tools empower you to strategically insert or remove anchor points, enabling more flexibility when shaping complex objects.
- For precise control over your paths, utilize the Convert Point tool (Shift+C). This tool lets you switch between smooth curves and sharp corners, allowing you to create shapes with both gentle bends and defined angles.
Working With Complex Shapes
Clipping paths aren't limited to simple objects. You can also use them to select and extract subjects with intricate shapes, such as hair, trees, or detailed product images. Here are some techniques to help you handle complex shapes:
- Use the Zoom tool (Z) to magnify your image and examine finer details.
- When outlining hair or fur, try using smaller, curved segments rather than a continuous line. This technique helps to capture the natural flow and texture of the strands.
- Take advantage of the Refine Edge feature to smooth out rough edges and fine-tune the Selection. You can access this feature by right-clicking on your path and selecting "Make Selection."
Then, go to Select > Modify > Smooth.
Adding Feather to the Edges
To achieve a smooth and natural look when placing your object on a new background, you can soften the edges of your clipping path with feathers. Here's how to add them:
- Select the path you have created by holding down the Ctrl (or Command) key and clicking on the path thumbnail in the Paths panel.
- Go to Select > Modify > Feather and choose a value that suits the image and desired effect. Start with a small value and increase it gradually until you achieve the desired softness.
- Now, copy and paste your selected subject onto a new background. The feathered edges create a smoother transition, making the subject look more natural and integrated.
Using Clipping Path with Other Photoshop Features
Using a clipping path in Photoshop opens creative possibilities by combining other additional photoshop features. Here are a few ways you can make the most out of the clipping path:
- Layer Masks: Apply a layer mask to your selected subject to further refine the edges or make adjustments. It allows for non-destructive editing.
- Smart Objects: Convert your subject into a Smart Object before applying the clipping path. It allows you to resize it without losing any quality or detail.
- Blend Modes: Experiment with different blend modes to achieve various blending effects between your subject and the background. It can add depth and atmosphere to your composition.
- Layer Styles: Apply layer styles, such as drop shadows or glows, to your subject layer to make it look more polished and professional.
Frequently Asked Questions Of How To Create Clipping Path In Photoshop?
What is a Clipping Path?
A clipping path is a closed vector path to cut out in an image editing software. Anything inside the path will be included, eliminating things outside the selected path. Clipping path tool is needed for removing background,image cut-outs, or enhancing product photos for an attractive look
How Do You Create A Clipping In Photoshop?
To create a clipping in Photoshop:
- Use the Pen Tool to outline the object you want to clip.
- Right-click and select "Make Selection".
- Choose the desired options and click "OK".
- Go to the "Edit" menu and click "Cut".
How Do I Create A Cut Path In Photoshop?
To create a cut path in Photoshop, follow these steps:
- Open your image in Photoshop.
- Choose the Pen Tool from the toolbar.
- Select the desired shape option in the options bar.
- Create points around the area you want to cut.
- Close the path by connecting the first and last points.
- Right-click on the path and choose "Make Selection".
- Adjust the settings and click OK to create the cut path.
How Do I Make An Image A Clipping Path?
To make an image a clipping path:
- Use graphic editing software like Photoshop.
- Open the image and select the Pen Tool.
- Create a path around the area you want to keep, then right-click and choose "Make Selection
- ."Use the Selection as a clipping path to isolate the desired portion of the image.
How Do I Make a Path Selection In Photoshop?
To make a path selection in Photoshop:
- Use the Pen Tool to draw a path around the desired area.
- Right-click on the path and choose "Make Selection" from the menu.
- Adjust the selection settings as needed and click OK to create the path selection.
Conclusion
Lastly, creating a clipping path in Photoshop is not rocket-science. If you read this blog thoroughly and follow step-by-step guidelines, you can become a pro at editing your photos. Therefore, if you give time to practice with different techniques you can easily catch the whole process easily.
With a little patience and effort, you'll be able to use clipping paths very easily. Happy learning!
Related blog posts
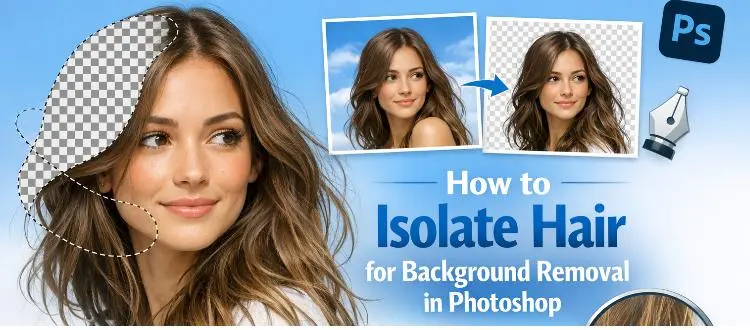
How to Isolate Hair for Background Removal in Photoshop
Are you tired of spending hours trying to perfectly isolate hair from a background in Photoshop, only to end up with messy, unnatural edges? You're not alone.
Clipping Path Associate has empowered businesses globally for over 12 years. A passionate team is dedicated to providing meticulous photo editing services. Expertise is offered in a range of areas, from precise clipping paths to flawless image retouching. The company offers straightforward yet impactful solutions tailored for photographers, e-commerce enterprises, advertising agencies, web design firms, magazine publishers, printing companies, and more.
We Accept : 